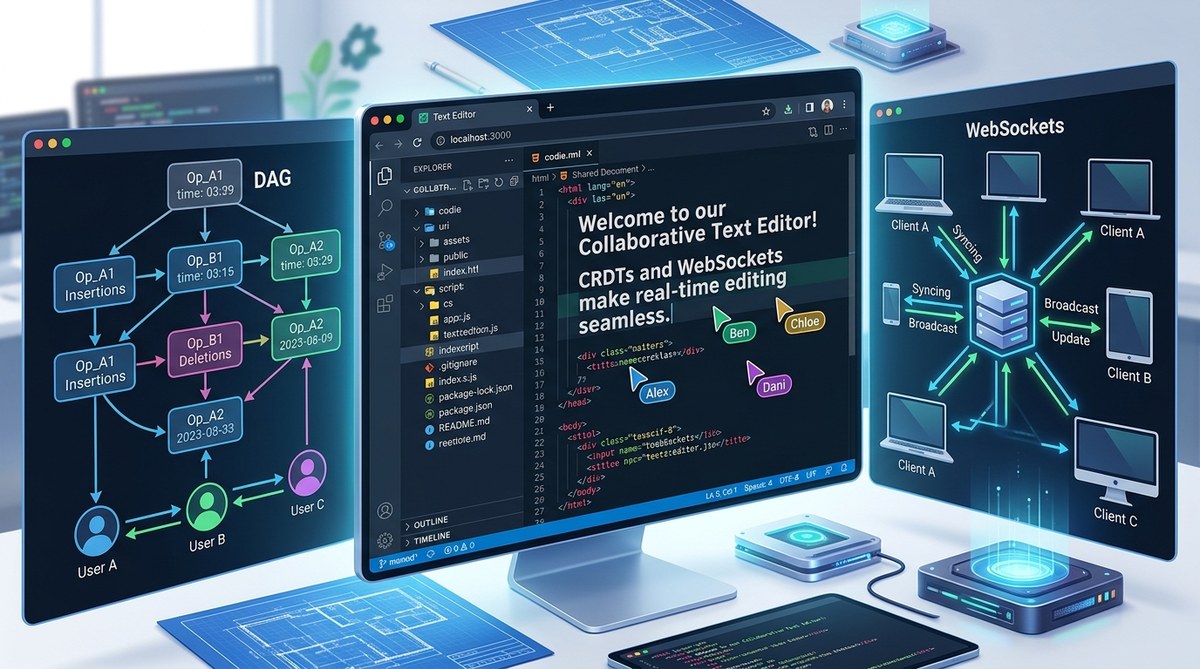
Picture two developers in different time zones typing in the same document at the exact same moment. No lost words. No conflicts. No frustrating "someone else is editing" messages. That is the magic of Conflict Free Replicated Data Types (CRDTs) combined with WebSockets. In 2026, building a collaborative text editor is easier than ever thanks to mature libraries and solid tooling. Whether you are adding real time features to a project management tool or creating the next big writing app, this guide will walk you through the entire process.
Building a collaborative text editor requires a solid sync layer that handles concurrent edits without data loss. CRDTs solve this mathematically, while WebSockets provide the real time transport. With Yjs as your CRDT library and a Node.js WebSocket server, you can create a production ready editor in less than a day. Focus on user presence and awareness for a polished experience.
Understanding CRDTs and Why They Matter
A CRDT is a data structure that allows multiple users to edit the same data independently and then merge those edits without conflicts. No central authority decides which change wins. Each edit carries metadata that ensures all copies converge to the same final state.
This is different from Operational Transformation (OT), which requires a central server to order operations. CRDTs work peer to peer or through a server, and they handle offline edits gracefully. If a user goes offline, types a paragraph, and comes back, the CRDT merges that paragraph into the document without breaking anything.
For a collaborative text editor, you care about one primary data type: the sequence of characters. Yjs, the most popular CRDT library in the JavaScript ecosystem, provides a Y.Text type designed exactly for this.
Setting Up Your Project
Before writing any code, set up your project structure. You will need a server for WebSocket management and a client for the editor UI.
Here is a checklist to get started:
- Node.js version 20 or higher installed
- A React project scaffolded with Vite or Create React App
- A basic understanding of WebSocket events
- Familiarity with npm or yarn
Follow these steps to initialize your workspace:
- Create a new directory and run
npm init -yfor the server. - Install
wsfor WebSocket support andyjsfor CRDT functionality on the server. - Create a separate directory for the client and scaffold a React app using
vite. - Install
y-websocketwhich provides a ready made WebSocket provider for Yjs. - Install
y-codemirror.nextorslate-yjsdepending on your editor preference. This guide uses a plain contenteditable approach to keep things simple.
That is all the setup you need. The magic happens when you connect the CRDT to the WebSocket layer.
Building the WebSocket Server with Node.js
The WebSocket server acts as a relay for Yjs updates. It does not need to understand the content of the document. It just forwards binary updates between clients.
Start by creating a basic WebSocket server using the ws library.
import { WebSocketServer } from 'ws';
import { Doc } from 'yjs';

const wss = new WebSocketServer({ port: 1234 });
const docs = new Map();

wss.on('connection', (ws, req) => {
  const room = new URL(req.url, 'http://localhost').searchParams.get('room') || 'default';

  if (!docs.has(room)) {
    docs.set(room, new Doc());
  }

  const doc = docs.get(room);
  const yText = doc.getText('content');

  // Send current state to new client
  ws.send(yText.toJSON());

  // Listen for updates from this client
  ws.on('message', (data) => {
    // Broadcast to all other clients
    wss.clients.forEach(client => {
      if (client !== ws && client.readyState === 1) {
        client.send(data);
      }
    });
  });
});
This server does three things:
- Creates a new Yjs document per room
- Sends the current document state to new connections
- Broadcasts incoming changes to all other clients
For a production system you will want to persist document state, handle reconnections, and manage memory. But this skeleton works great for learning.
Integrating Yjs for Conflict Resolution
On the client side, Yjs handles all the conflict resolution automatically. You create a local Doc instance, connect it to the editor UI, and sync it with the server.
Here is how the client side setup looks:
import * as Y from 'yjs';
import { WebsocketProvider } from 'y-websocket';

const doc = new Y.Doc();
const provider = new WebsocketProvider('ws://localhost:1234', 'my-room', doc);
const yText = doc.getText('content');

// Bind to DOM element
const editor = document.getElementById('editor');

const updateEditor = () => {
  editor.textContent = yText.toString();
};

// Observe changes from other users
yText.observe(updateEditor);

// Listen for local input
editor.addEventListener('input', () => {
  yText.delete(0, yText.length);
  yText.insert(0, editor.textContent);
});
This pattern is simple but effective. The WebsocketProvider syncs the local Yjs document with the server. When the local user types, you update the Y.Text type, which triggers a sync. When remote users make changes, the observe callback fires and updates the DOM.
Creating the React Frontend
If you are using React, wrap the Yjs binding in a custom hook. This keeps your components clean and prevents memory leaks.
Here is an example hook:
function useYText(doc, name = 'content') {
  const [text, setText] = useState('');
  const yText = useMemo(() => doc.getText(name), [doc, name]);

  useEffect(() => {
    const update = () => setText(yText.toString());
    yText.observe(update);
    return () => yText.unobserve(update);
  }, [yText]);

  const updateText = useCallback((newText) => {
    yText.delete(0, yText.length);
    yText.insert(0, newText);
  }, [yText]);

  return [text, updateText];
}
Then use it inside your editor component:
function CollaborativeEditor() {
  const [doc] = useState(() => new Y.Doc());
  const [text, setText] = useYText(doc);

  useEffect(() => {
    const provider = new WebsocketProvider('ws://localhost:1234', 'editor-room', doc);
    return () => provider.destroy();
  }, [doc]);

  return (
    <div
      contentEditable
      onInput={(e) => setText(e.currentTarget.textContent)}
      dangerouslySetInnerHTML={{ __html: text }}
      style={{ border: '1px solid #ccc', padding: '10px', minHeight: '300px' }}
    />
  );
}
This approach works with any framework. The key is keeping the Yjs document alive outside of render cycles.
Adding User Presence and Cursors
A text editor without seeing other users feels empty. Yjs supports an awareness protocol that allows you to share user state like cursor position and name.
The awareness object is part of the WebsocketProvider:
provider.awareness.setLocalStateField('user', {
  name: 'Alice',
  color: '#ff0000'
});
When a remote user moves their cursor, the awareness fires an update. You can render their cursor position as a colored line.
provider.awareness.on('change', (changes) => {
  const states = Array.from(provider.awareness.getStates());
  states.forEach(([clientId, state]) => {
    if (state.cursor) {
      // Render cursor at state.cursor.position
    }
  });
});
Cursor synchronization makes the editor feel alive. Users see who is typing and where they are focused.
Common Pitfalls and How to Avoid Them
Even with a mature library like Yjs, some mistakes can cause trouble. Here is a table of common issues and their solutions.
| Problem | Cause | Solution |
|---|---|---|
| Document corruption on reconnect | Missing state persistence | Store Yjs updates in a database and replay on server start |
| High memory usage with many rooms | Creating new Doc objects without cleanup | Implement a garbage collector that removes empty rooms after a timeout |
| Slow sync with large documents | Sending entire state on every change | Use Yjs's incremental updates and compress with gzip |
| Cursor positions desynchronize | Not updating awareness on every selection change | Throttle awareness updates to 30ms intervals instead of every event |
| Conflicts in rich text formatting | Applying mutations to both the CRDT and the DOM directly | Use a library like Slate with Yjs integration to manage the document model |
Keep your WebSocket server stateless. Store all document state in Yjs documents in memory, and persist only the update log. This makes scaling horizontally easier because any server can reconstruct the full document from the log.
Testing Your Collaborative Editor
Test with realistic scenarios. Open two browser windows side by side. Type in one and watch the other update. Then try more complex cases.
- Type at the same position in both windows at the exact same time.
- Delete a range of text while another user inserts characters inside that range.
- Disconnect and reconnect one user while they have unsaved changes.
- Test with three or more users editing simultaneously.
If you see phantom characters or duplication, check your event listeners. A common mistake is attaching multiple observe callbacks to the same Yjs text type, causing the DOM to update twice and interleave characters.
Scaling Your Editor for Real World Use
Once your prototype works, think about production needs. A single WebSocket server works for small teams, but larger deployments require a distributed approach.
Use a message broker like Redis to relay updates between WebSocket server instances. This way you can run multiple servers behind a load balancer.
For persistence, store Yjs updates in a database. Every client continuously produces updates. Persist them periodically so that when a server restarts, it can replay the updates and restore the document state.
The Yjs ecosystem includes providers for many backends including LevelDB and SQLite. Choose one that fits your infrastructure.
Why Choose CRDTs Over Operational Transformation
Operational Transformation has been around for decades and powers tools like Google Docs. But CRDTs have advantages for modern web development.
| Aspect | OT | CRDT |
|---|---|---|
| Server dependency | Requires a central server to order operations | Works peer to peer or with a simple relay server |
| Offline support | Difficult to implement correctly | Built in by design |
| Complexity of implementation | Very high, many edge cases | Lower, mathematically proven |
| Merge behavior | Deterministic across sessions | Deterministic across sessions |
| Ecosystem maturity | JavaScript libraries are limited | Yjs and Automerge are production ready |
For most new projects in 2026, CRDTs are the better choice. They simplify architecture and reduce the cognitive load on developers.
Bringing Your Collaborative Editor to Life
You now have the knowledge to build a real time collaborative text editor. Start with the simple setup described here, then add features like formatting, images, and user presence.
Building a collaborative editor is one of the most rewarding projects a developer can tackle. It changes how people work together online. Within a few hours you can have a working prototype. With a few more days of polish you can ship something people actually want to use.
If you want to learn more about related topics, check out our guide on how to build a real-time chat app with WebSockets and JavaScript. The same principles apply, and combining chat with collaborative editing creates a powerful communication tool.
Keep coding, keep shipping, and remember that the best way to learn is to build something real. Open your editor, start typing, and watch the magic of CRDTs make collaboration frictionless.