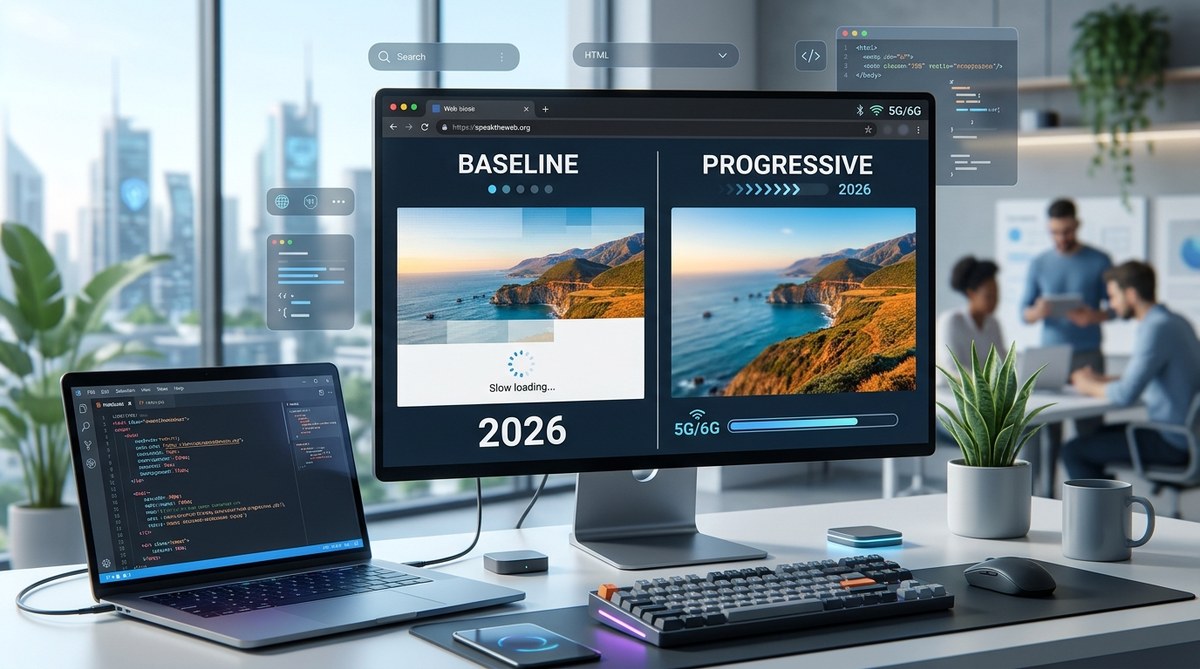
You spend hours optimizing your CSS. You compress your JavaScript. You set up a CDN. But your hero images still load line by line, forcing users to wait for the entire file before they see anything. There is a format that solves this problem, and it has been around for decades. Progressive JPEG is not a relic. It is a practical tool for improving perceived web performance, especially on slower connections.
Progressive JPEG loads a blurry version of an image first, then refines it in passes. This lets users see the content sooner, reducing perceived wait time. While formats like WebP and AVIF offer smaller file sizes, progressive JPEG remains a reliable fallback for browsers that do not support modern formats. In 2026, it is a smart addition to any performance engineer’s toolkit for improving real-world load experiences.
What Makes a JPEG Progressive
A standard baseline JPEG encodes the image in a single pass. The browser has to download the entire file before it can display anything. A progressive JPEG, on the other hand, stores the image data in multiple scans. The first scan contains a low-resolution version of the image. Subsequent scans add more detail.
When a browser renders a progressive JPEG, it shows the low-quality version almost immediately. Then it sharpens the image as more data arrives. The user sees something recognizable within a second or two, even if the full download takes much longer. This technique directly improves the perceived load time of a page.
“Perceived performance is the only performance that matters to your users. If they see something happening, they are far less likely to abandon the page.” – Tim Kadlec, author of Implementing Responsive Design
The Case for Progressive JPEG in 2026
You might be thinking: “Why not just use WebP or AVIF?” Those formats are excellent. They offer better compression and smaller file sizes. But they are not universally supported by every browser and every device. Progressive JPEG works everywhere. Every browser that supports JPEG also supports progressive JPEG. That includes old browsers, feature phones, and smart TVs.
Here is the reality of the web in 2026:
- WebP has good support, but some legacy browsers and email clients still do not handle it.
- AVIF is gaining ground, but its support is still patchy on older operating systems.
- JPEG is the universal language of images on the web.
Progressive JPEG gives you the best of both worlds. You get the universal compatibility of JPEG, plus a performance boost that benefits users on slow networks. It is not a replacement for modern formats. It is a fallback that performs better than a standard JPEG.
How to Create a Progressive JPEG
Creating a progressive JPEG is straightforward. Most image processing tools support it. Here is a simple process you can follow:
- Open your source image in an editor like Photoshop, GIMP, or ImageMagick.
- Export or save the file as a JPEG.
- Select the “Progressive” or “Progressive JPEG” option in the export settings.
- Set the quality level (usually between 70 and 85 for web use).
- Save the file and test it in a browser.
For command line users, ImageMagick makes this easy:
convert input.png -interlace Plane -quality 80 output.jpg
The -interlace Plane flag tells ImageMagick to save the file as a progressive JPEG. That is all it takes.
When to Use Progressive JPEG
Not every image on your site needs to be progressive. Here is a breakdown of when it makes sense and when it does not.
Use It For
- Hero images and large banners that appear above the fold.
- Product images on e-commerce sites where users browse multiple items.
- Background images that are large in file size.
- Any image that takes more than one or two seconds to load on a typical connection.
Skip It For
- Thumbnails and very small images (under 10 KB).
- Icons and decorative graphics where load time is negligible.
- Images that are already heavily compressed.
The table below summarizes the trade-offs.
| Technique | File Size Impact | Perceived Load Time | Best Use Case |
|---|---|---|---|
| Baseline JPEG | Smallest possible file | Slow (waits for full download) | Small images, thumbnails |
| Progressive JPEG | Slightly larger (5-10%) | Fast (shows blurry version first) | Large hero images, photos |
| WebP | Smaller than JPEG | Fast (smaller file) | Modern browsers only |
| AVIF | Smallest among formats | Fast (smaller file) | High-traffic sites with modern users |
Common Mistakes and How to Avoid Them
Progressive JPEG is not magic. If you use it incorrectly, it can hurt performance instead of helping it. Here are the most common mistakes developers make.
- Using progressive JPEG on every single image. This adds unnecessary overhead for small files. Stick to images over 50 KB.
- Setting the quality too high. A quality setting of 85 or higher creates a file that is too large. The progressive encoding adds a small amount of overhead, so keep the quality between 70 and 80.
- Forgetting to test on slow networks. A progressive JPEG shines on a 3G or 4G connection. Test your site using a network throttle tool to see the real benefit.
- Serving progressive JPEGs to browsers that do not handle them well. Most modern browsers handle progressive JPEGs correctly. But some older mobile browsers may render them poorly. Always test on your target audience’s devices.
How to Test Progressive JPEG Performance
You cannot just assume progressive JPEGs make your site faster. You need to measure the impact. Here is a practical testing workflow.
- Pick a page with a large hero image.
- Create both a baseline and a progressive version of that image.
- Use a tool like WebPageTest or Lighthouse to measure the time to first paint.
- Run the test with a simulated slow connection (3G or slower).
- Compare the results. Look for the time when the image becomes recognizable, not when it finishes loading.
The goal is to reduce the time a user waits before they see something meaningful. That is the metric that matters.
Progressive JPEG vs. Lazy Loading
Lazy loading is another technique for improving image performance. It delays loading an image until the user scrolls near it. Progressive JPEG and lazy loading are complementary, not competing. You can use both together.
For images above the fold, use progressive JPEG to make them appear faster. For images below the fold, use lazy loading to avoid downloading them at all until the user scrolls. Combined, these two techniques can dramatically improve perceived performance.
If you are building a site with a lot of images, you might also want to read about building responsive web interfaces with modern CSS grid and flexbox techniques to ensure your layouts do not break while images load.
The Role of Progressive JPEG in a Modern Image Pipeline
A modern image pipeline uses multiple formats and techniques. You serve WebP or AVIF to browsers that support them. You fall back to JPEG for everything else. That fallback JPEG should be progressive. It costs you almost nothing to enable, and it provides a better experience for users on older devices or slow networks.
Here is a bulleted list of steps to integrate progressive JPEG into your pipeline:
- Use a tool like ImageOptim or Squoosh to generate progressive JPEGs.
- Store both the baseline and progressive versions in your asset pipeline.
- Serve the progressive version as the default JPEG fallback.
- Monitor your Core Web Vitals to see if the change improves Largest Contentful Paint (LCP).
For a deeper look at optimizing your entire frontend workflow, check out our guide on how to optimize your front-end workflow with cutting-edge tools.
A Note on File Size Overhead
Progressive JPEGs are slightly larger than baseline JPEGs. The overhead is usually between 5% and 10%. That is a small price to pay for a big improvement in perceived load time. If file size is your absolute top priority, use WebP or AVIF for modern browsers and a progressive JPEG as the fallback. That way you get the smallest possible files for most users, while still providing a good experience for everyone else.
Putting Progressive JPEG to Work Today
You do not need to redesign your entire image strategy to benefit from progressive JPEG. Start small. Pick the five largest images on your homepage. Convert them to progressive JPEGs. Measure the difference in perceived load time. If you see an improvement, roll it out to the rest of your site.
The technique is simple, the tooling is free, and the benefit is real. In a world where users expect pages to load instantly, every millisecond counts. Progressive JPEG is one of the easiest wins you can grab.
For more ideas on improving your site’s speed, take a look at our list of 10 essential web APIs every developer should know in 2026. And if you are dealing with performance issues beyond images, our guide on 7 hidden web performance killers in modern JavaScript and how to fix them might help.
Your Next Step
Open your image editor. Export one large image as a progressive JPEG. Upload it to your site. Test it on a slow connection. You will see the difference immediately. Once you see how much faster the page feels, you will wonder why you did not do this sooner. It is a small change with a big impact on the user experience. Give it a try today.